Last time I posted about my Honda, I left things with the engine mostly apart, and the whole top of the engine sitting in the trunk. We were finally ready to put in a new head gasket, but there were plenty of things to do before that.
Before I start telling you about all of the cleaning and other prep work that it would take the get the engine back together, I should first explain the plan I had for this project. The engines in the first couple generations of Honda Civic were notorious for head gasket issues. A large part of this is because the engine uses an aluminum head on a cast iron block, and differing thermal expansion causes extra stress on the head gasket. However, at the time the cars were being made there was a real focus from Honda on the head bolts, and the entire engine series was updated with stronger head bolts with helical ridges that were supposed to resist stretching and provide better clamping despite thermal expansion.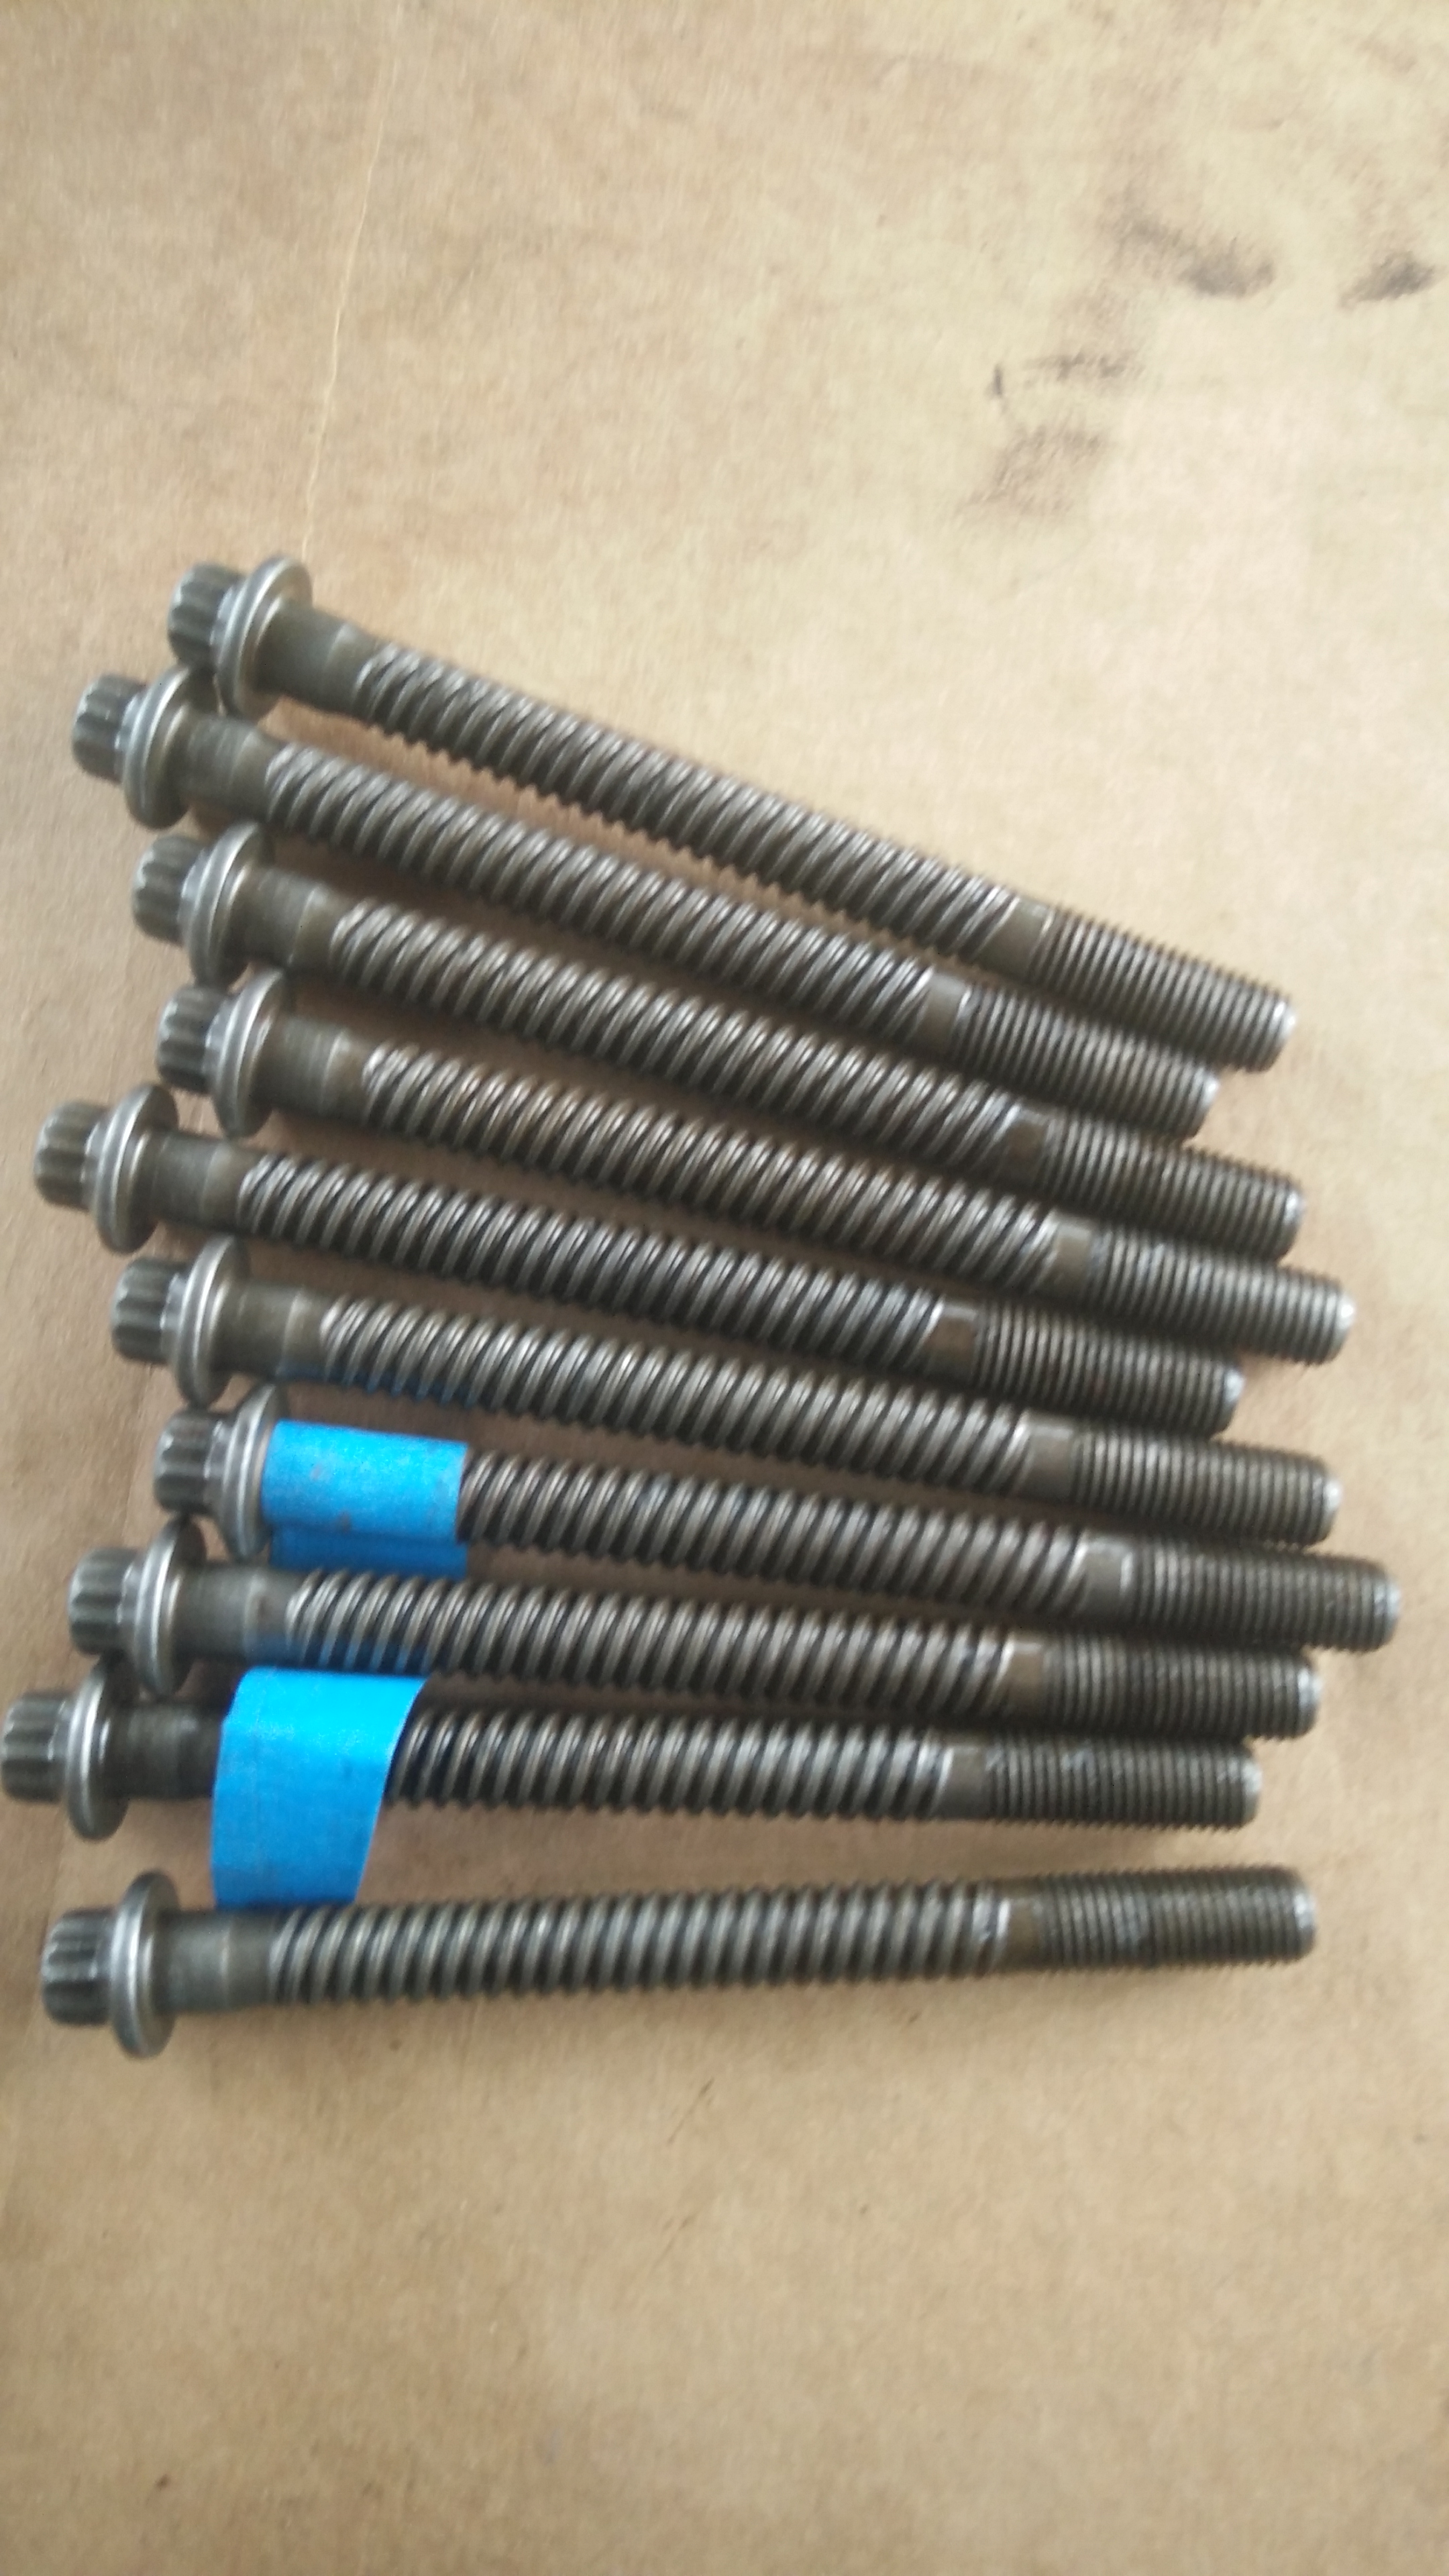
Because my car is a 1983, it came from the factory with these updated bolts, and I’m guessing that the bolts from the engine were the originals. I don’t particularly trust that the 1983 head bolts have retained their full strength, and given the the engine showed signs of at least one recent head gasket change I was guessing that they’d stretched out over the years and I wanted to upgrade. Unfortunately, it’s not even possible to get replacement stock bolts for this engine, and there are no aftermarket options whatsoever. However, the block’s threads are the same as a 90s D16 engine, which ARP makes head studs for! According to the 1stgencivic forum, the studs are longer than the bolts the CVCC engine uses, and so can be used if you cut them to length.
My plan for the car was to buy the ARP studs, a good head gasket and slap it back together pretty quickly. Because it was my first project of this scale and was so cheap, I didn’t want to get into expensive machine work or professional rebuilding. This meant that my parts list was shockingly short, the ARP studs (208-4305), a Fel-Pro gasket kit (HS21214PT3) and NGK spark plugs (BUR6EB-11).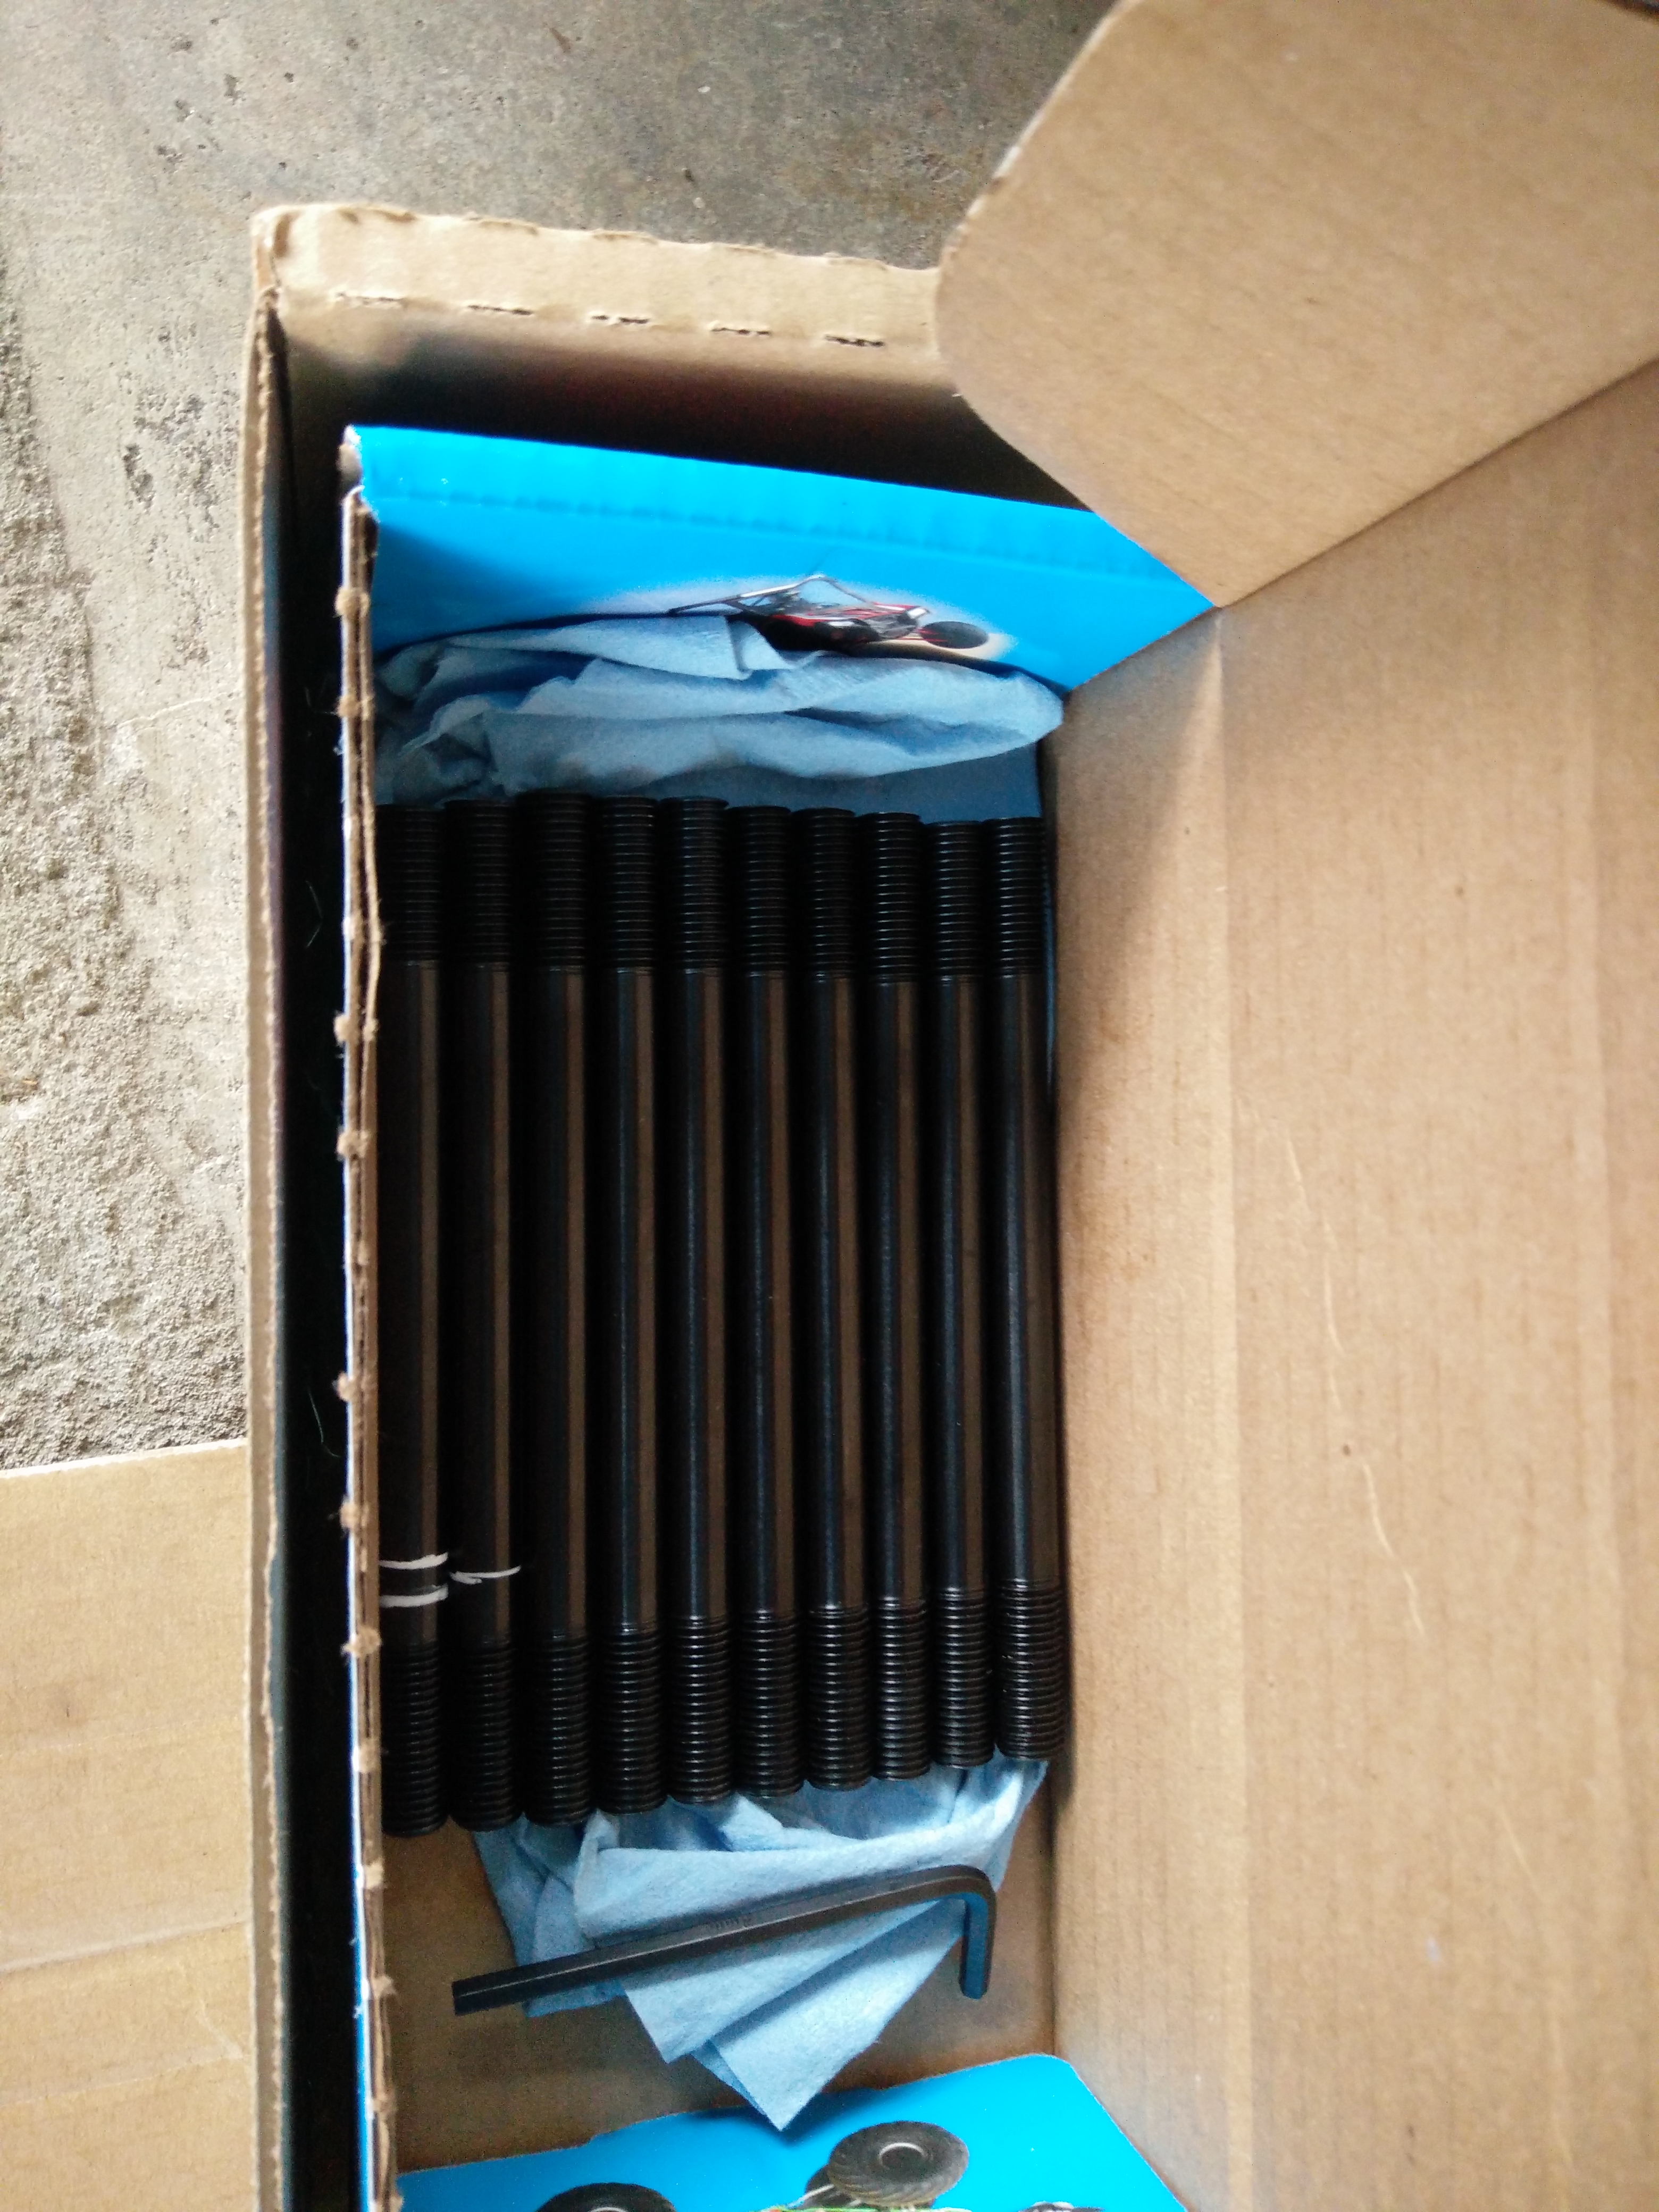
The first thing I did to begin test fitting the studs was to mark two of them as the ones that will be cut shorter than the rest, because they either have fewer threads in the block (front corner by cylinder 4) or need to sit deeper (the stud under the oil pump drive in the middle front of the engine), as you can see in the photo above. Initially I just test fit the studs and head without cutting them. This made it clear just how much they needed to be cut down!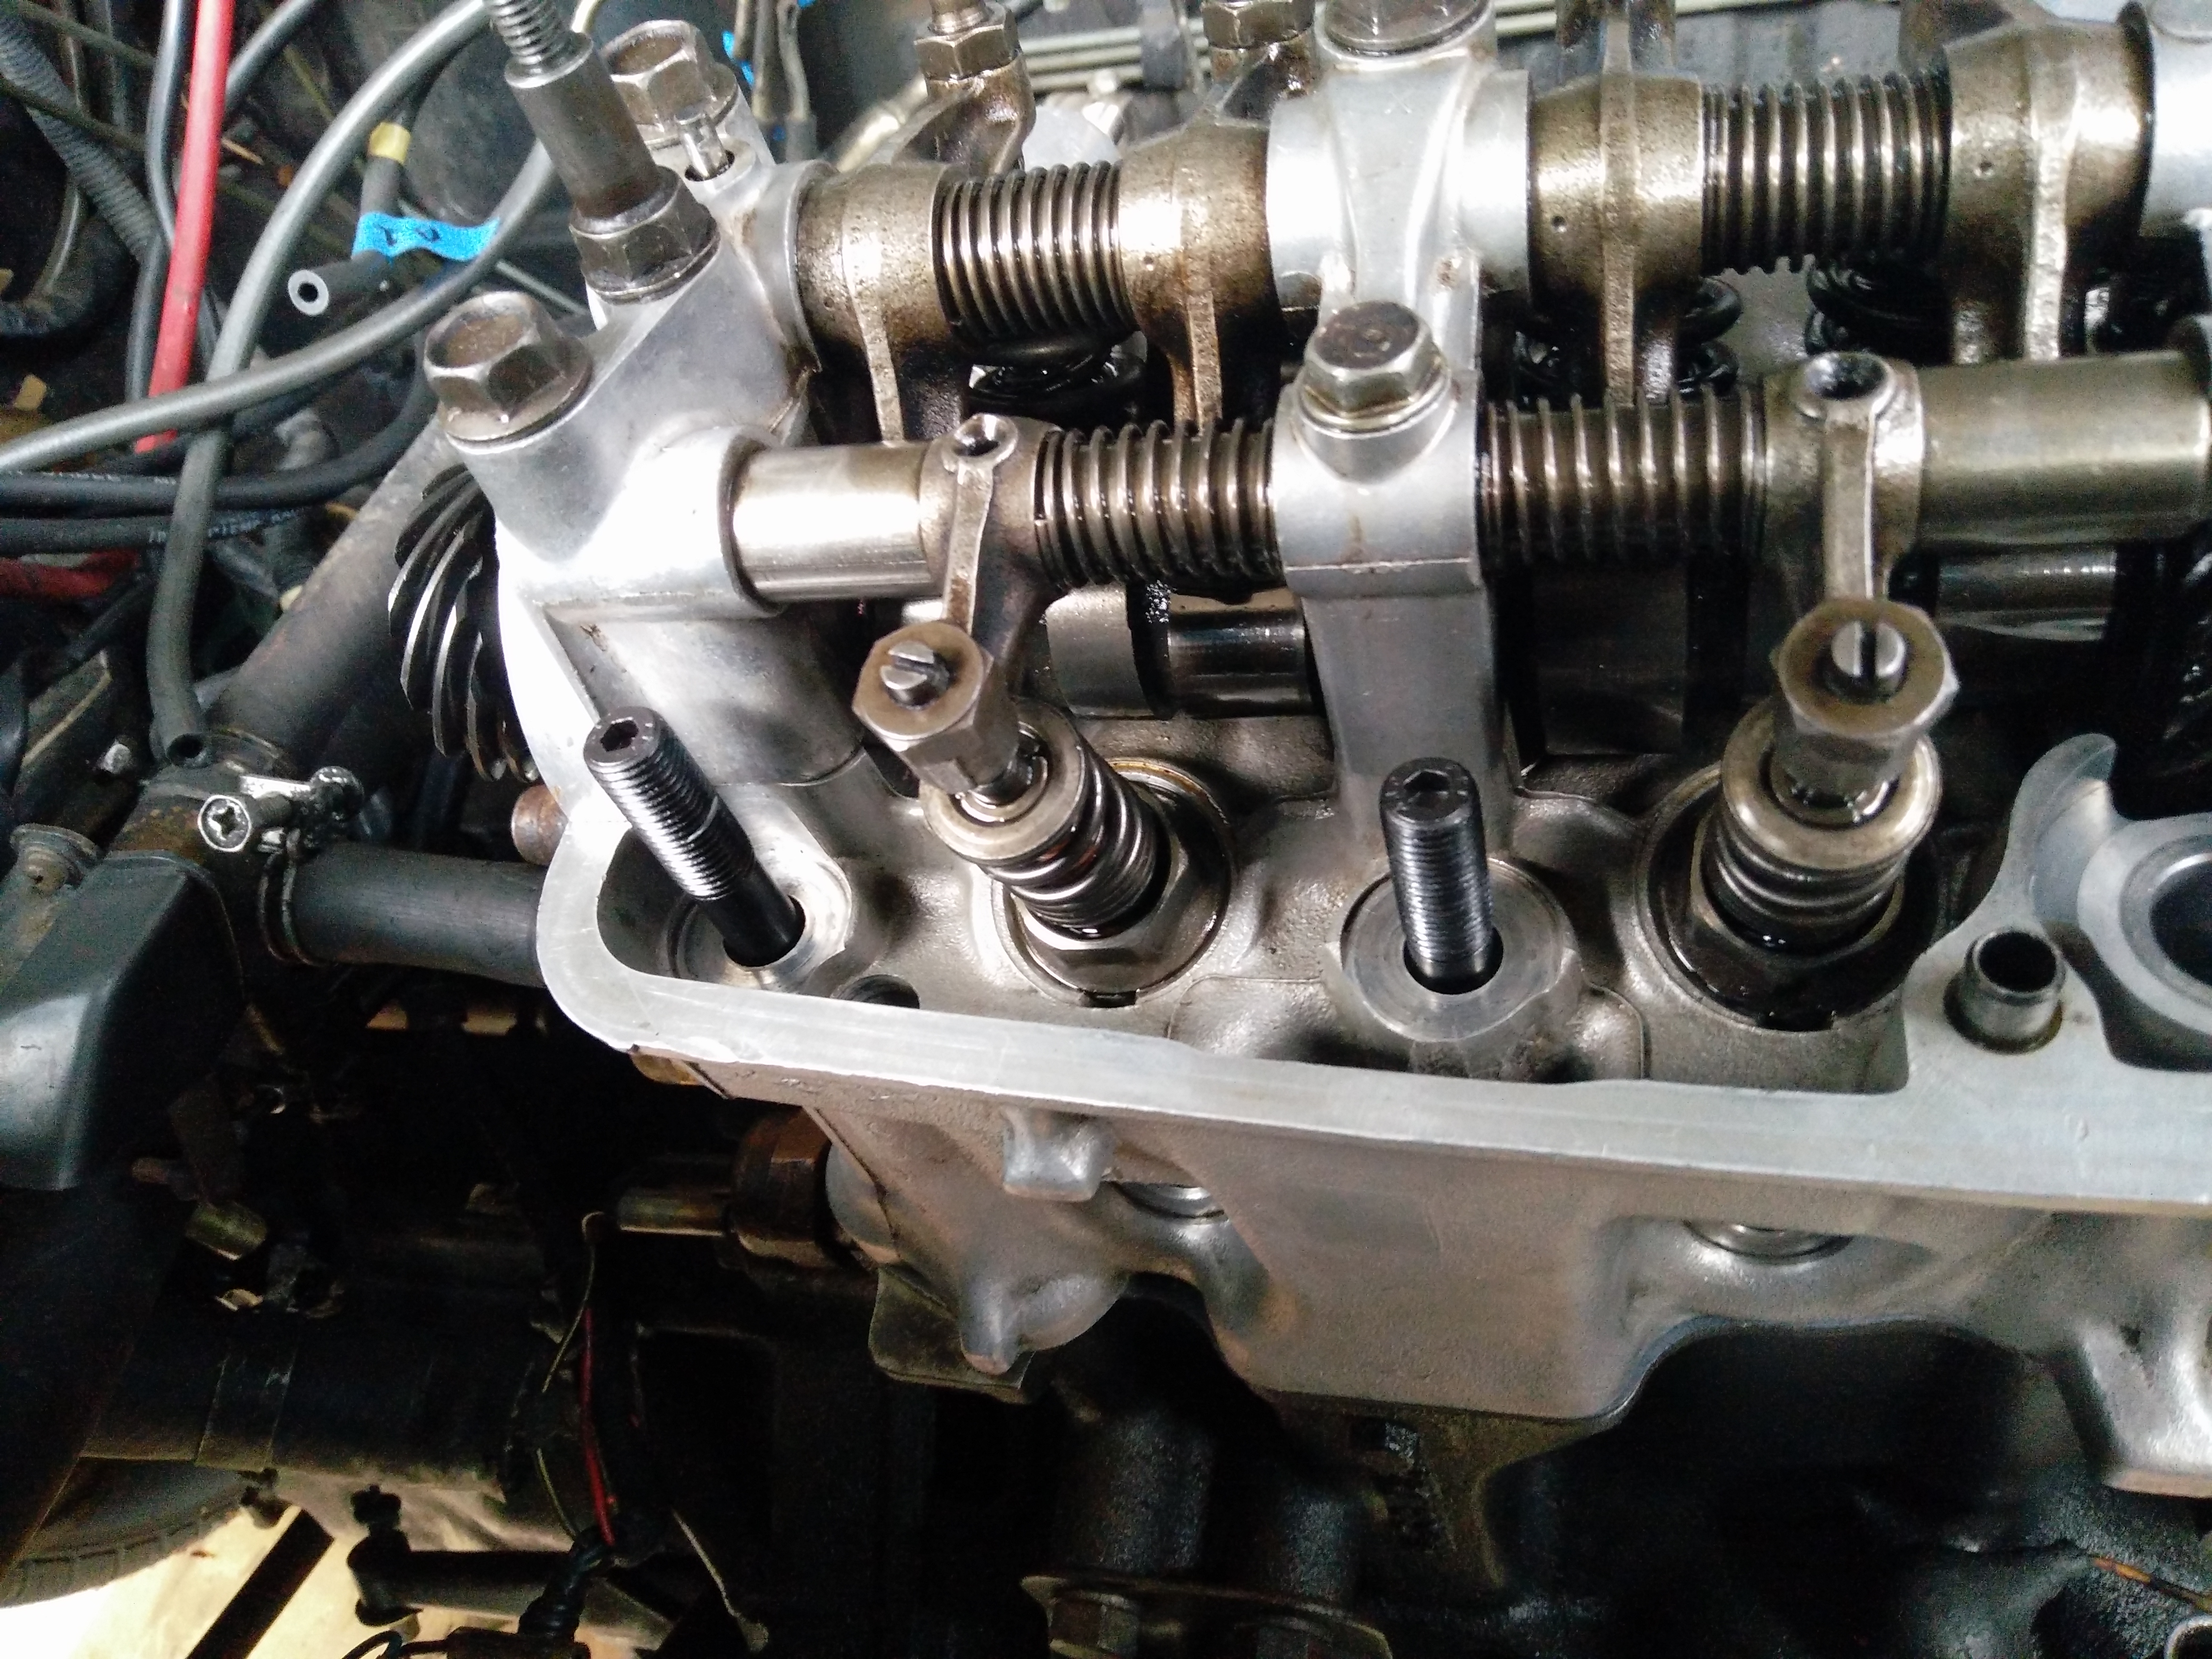
You can just barely see in the photo how I marked the length I was planning to cut off the studs before test fitting them (according to the forum, this was 16 mm under the oil pump drive, 14 mm in the front corner, and 12 mm for the rest). I was planning to cut the length off the bottom, but at this point I marked that length from the top of the stud so that I could see where the top would end up after I cut them.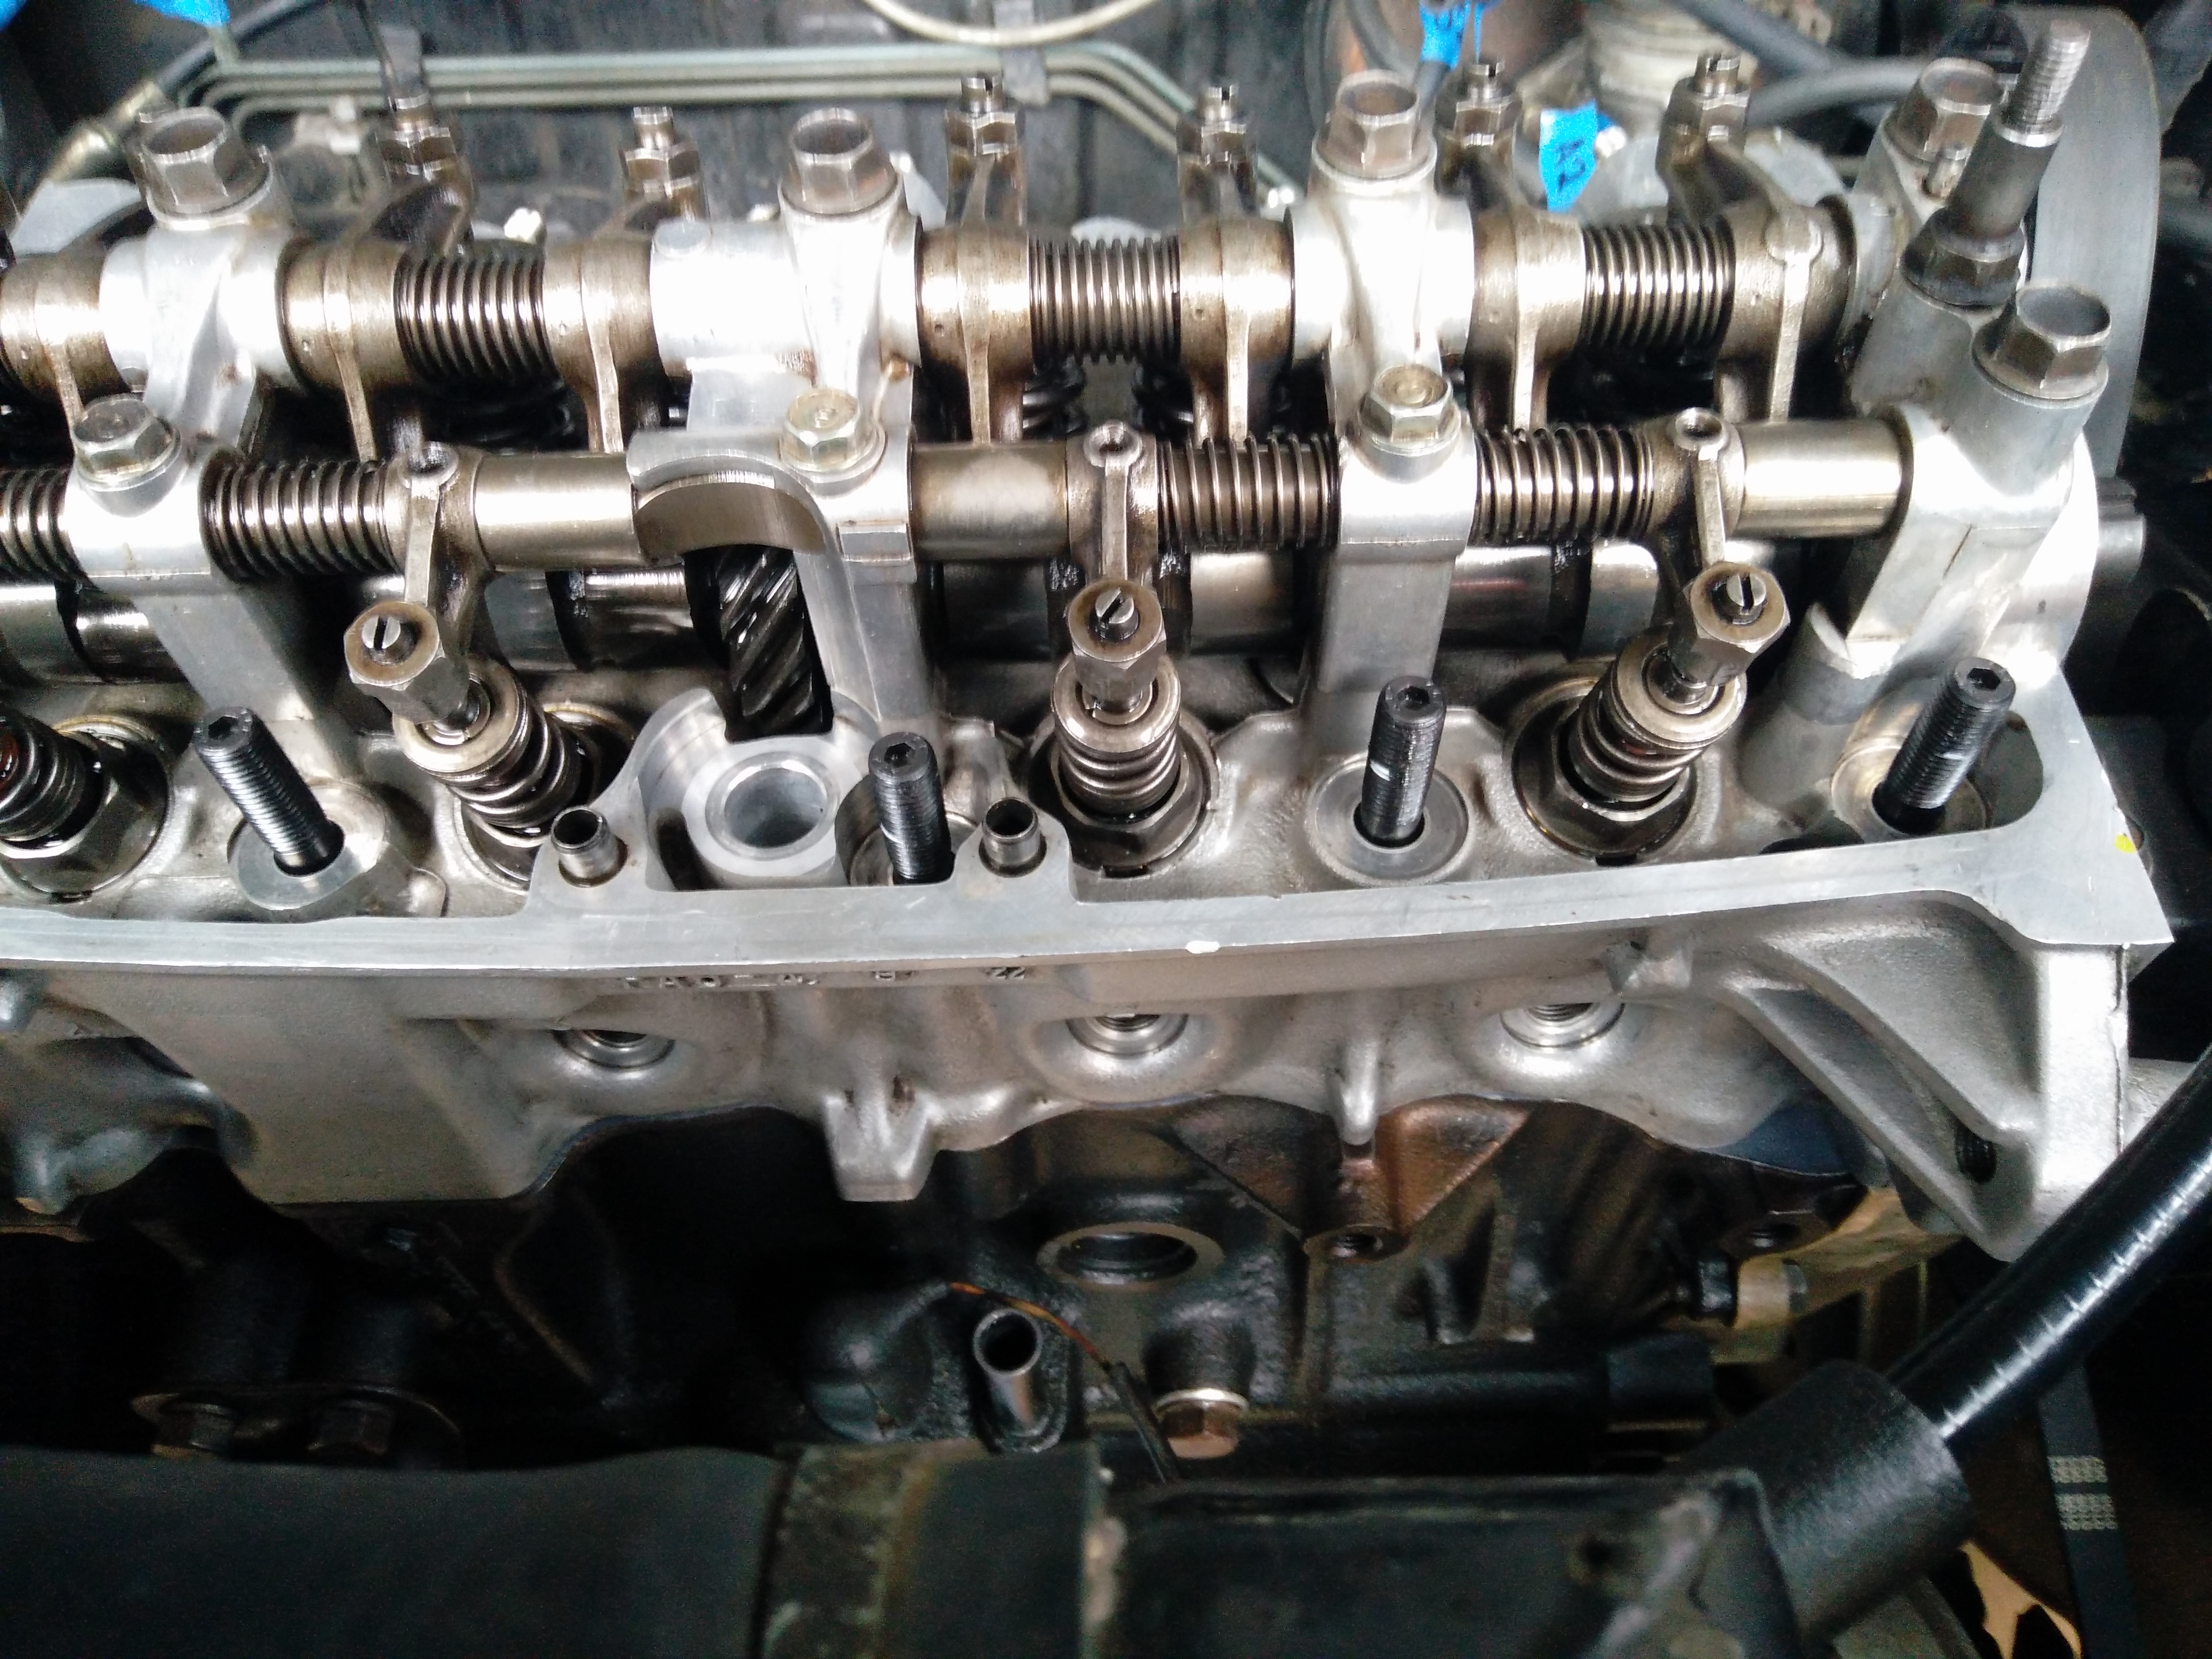
From this shot you can see how much the center stud sticks up above the base of the oil pump drive. This stud ended up being the one I worried the most about and spent the most time on. The others ended up having plenty of clearance, even the one in the front corner; luckily there’s a ton of room under the valve cover there.
The cutting went smoothly, I used a dremel cutoff wheel and went slowly to avoid overheating the stud and then cleaned up the edges and the threads with a file. After cutting they looked great and seemed to fit just as expected.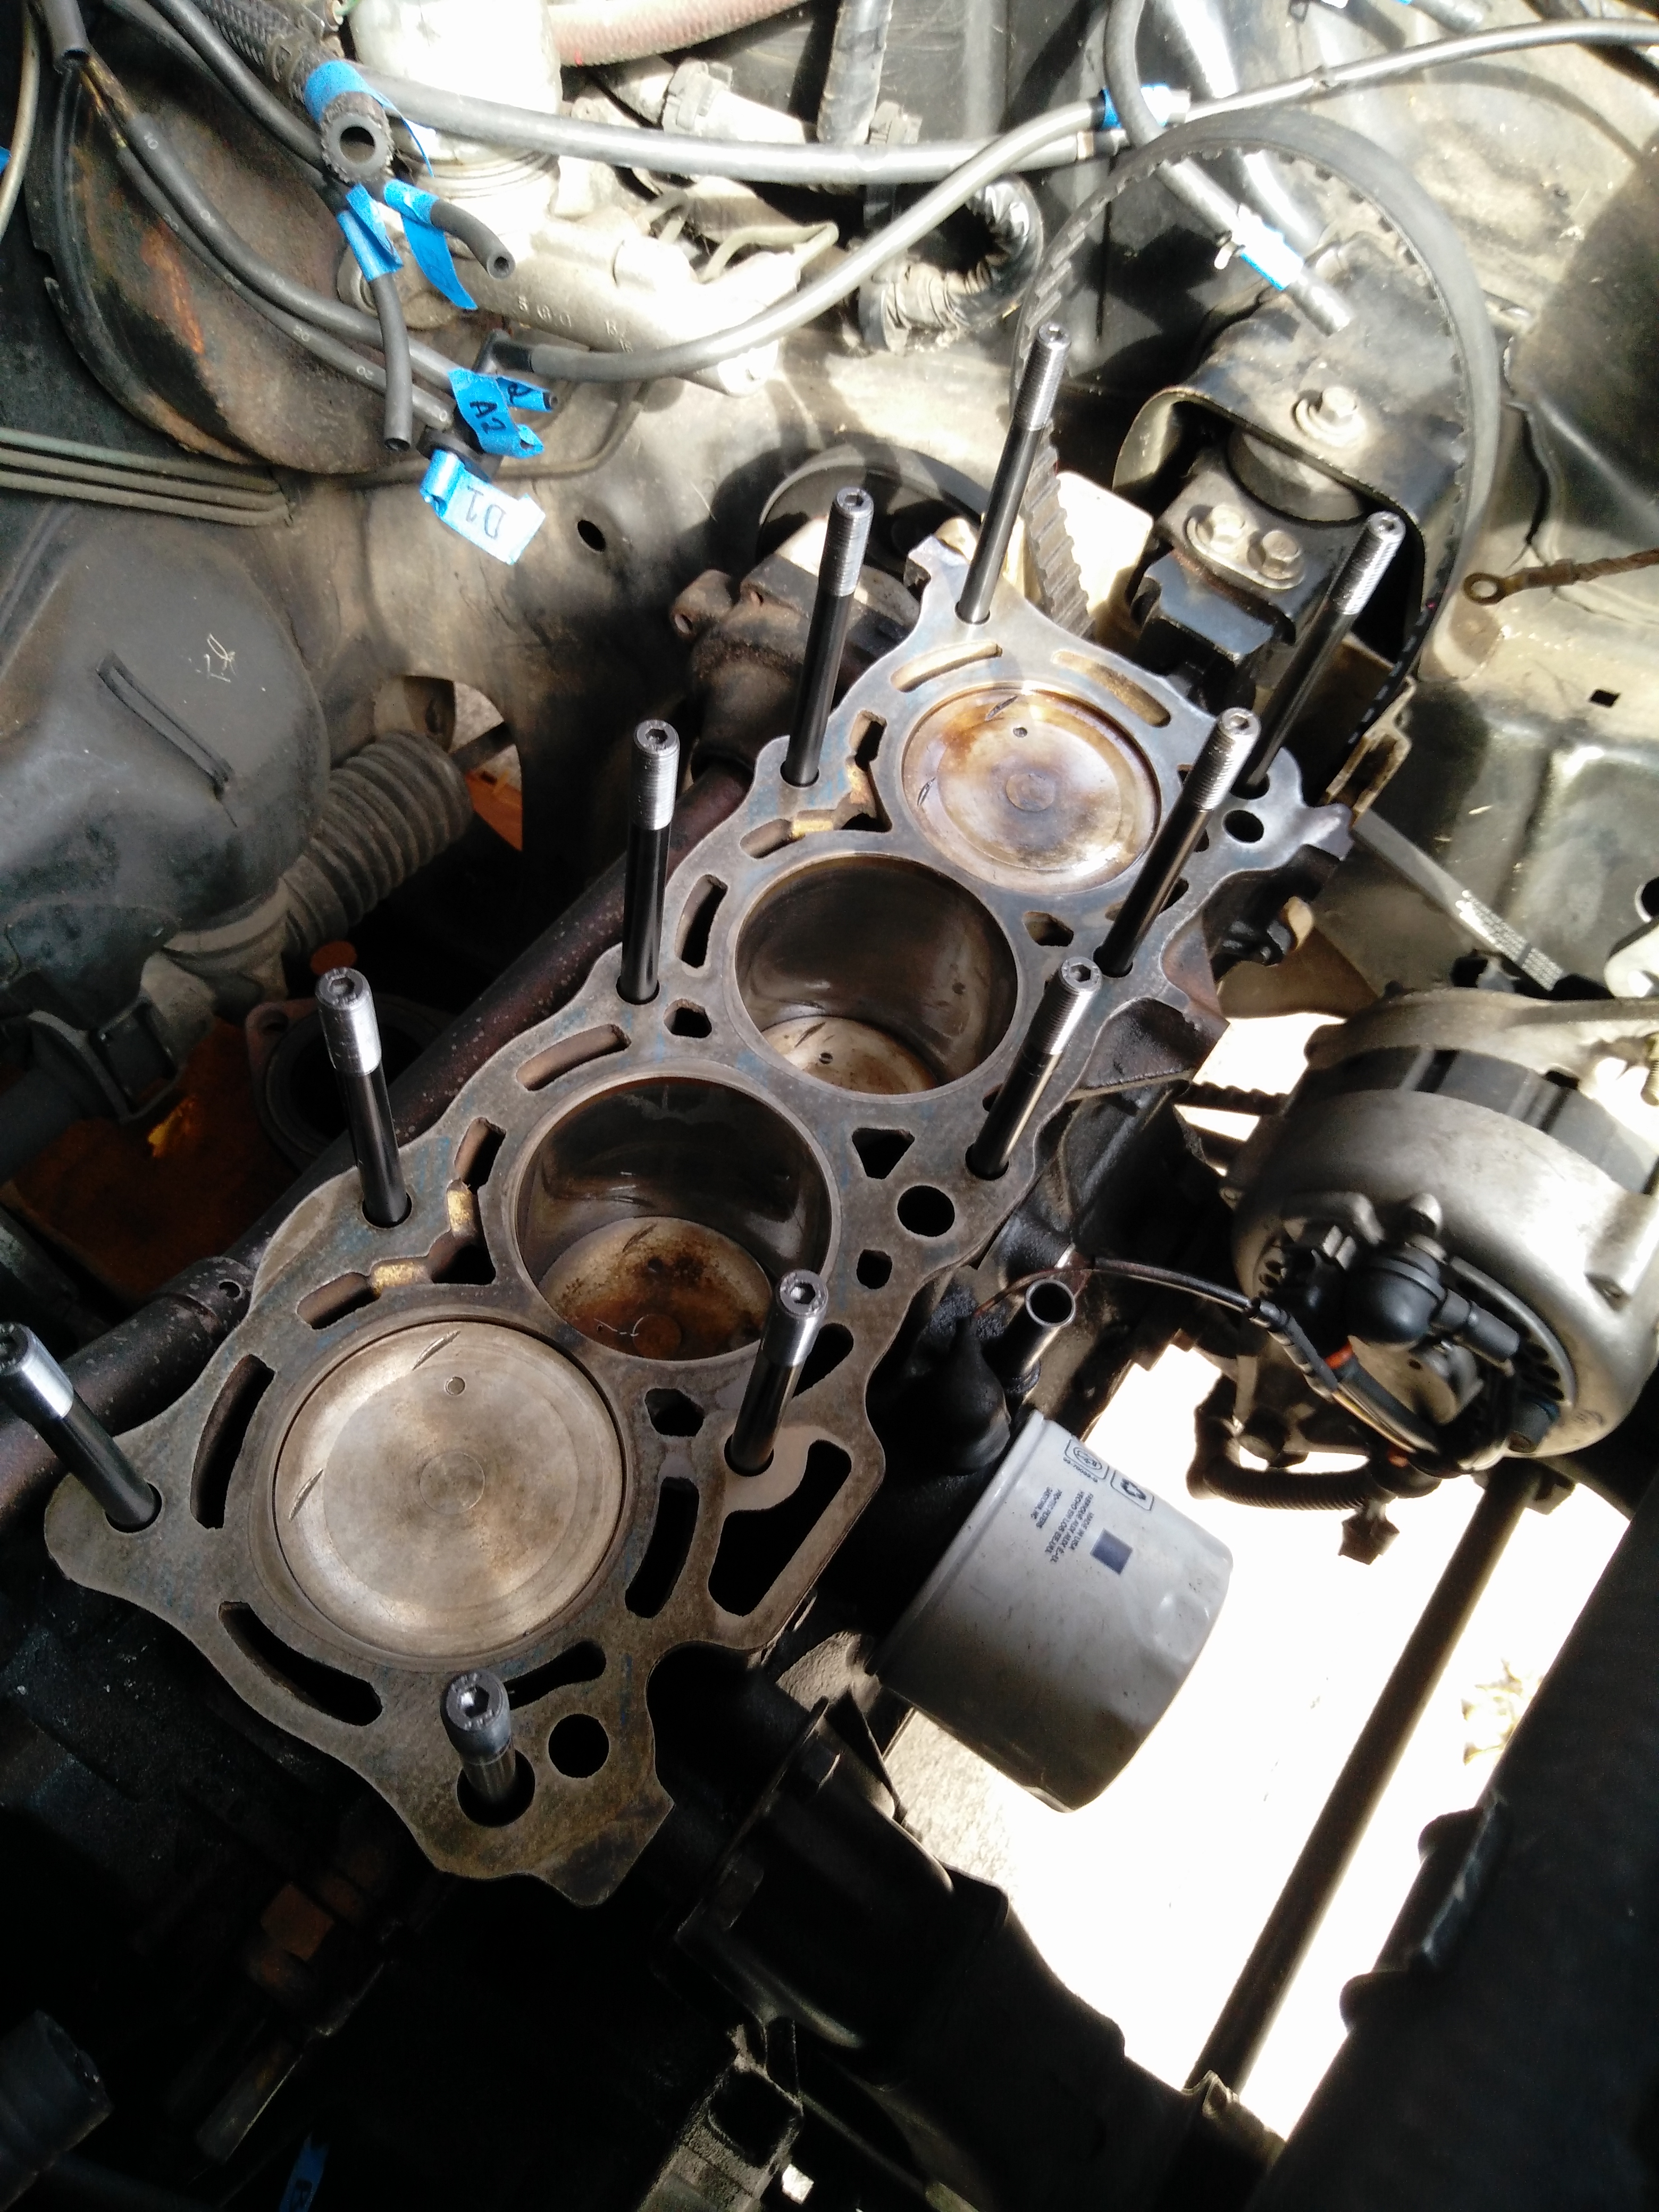

At this point point pretty much all of my attention was on the oil pump drive and the stud that went under it. It was really difficult to tell how much clearance it had, if any, because the stud was down in a well that was hard to access with the gear installed. I also couldn’t rotate the camshaft or drive gear easily, which made it even harder to tell if the stud would get in the way once the engine turned over.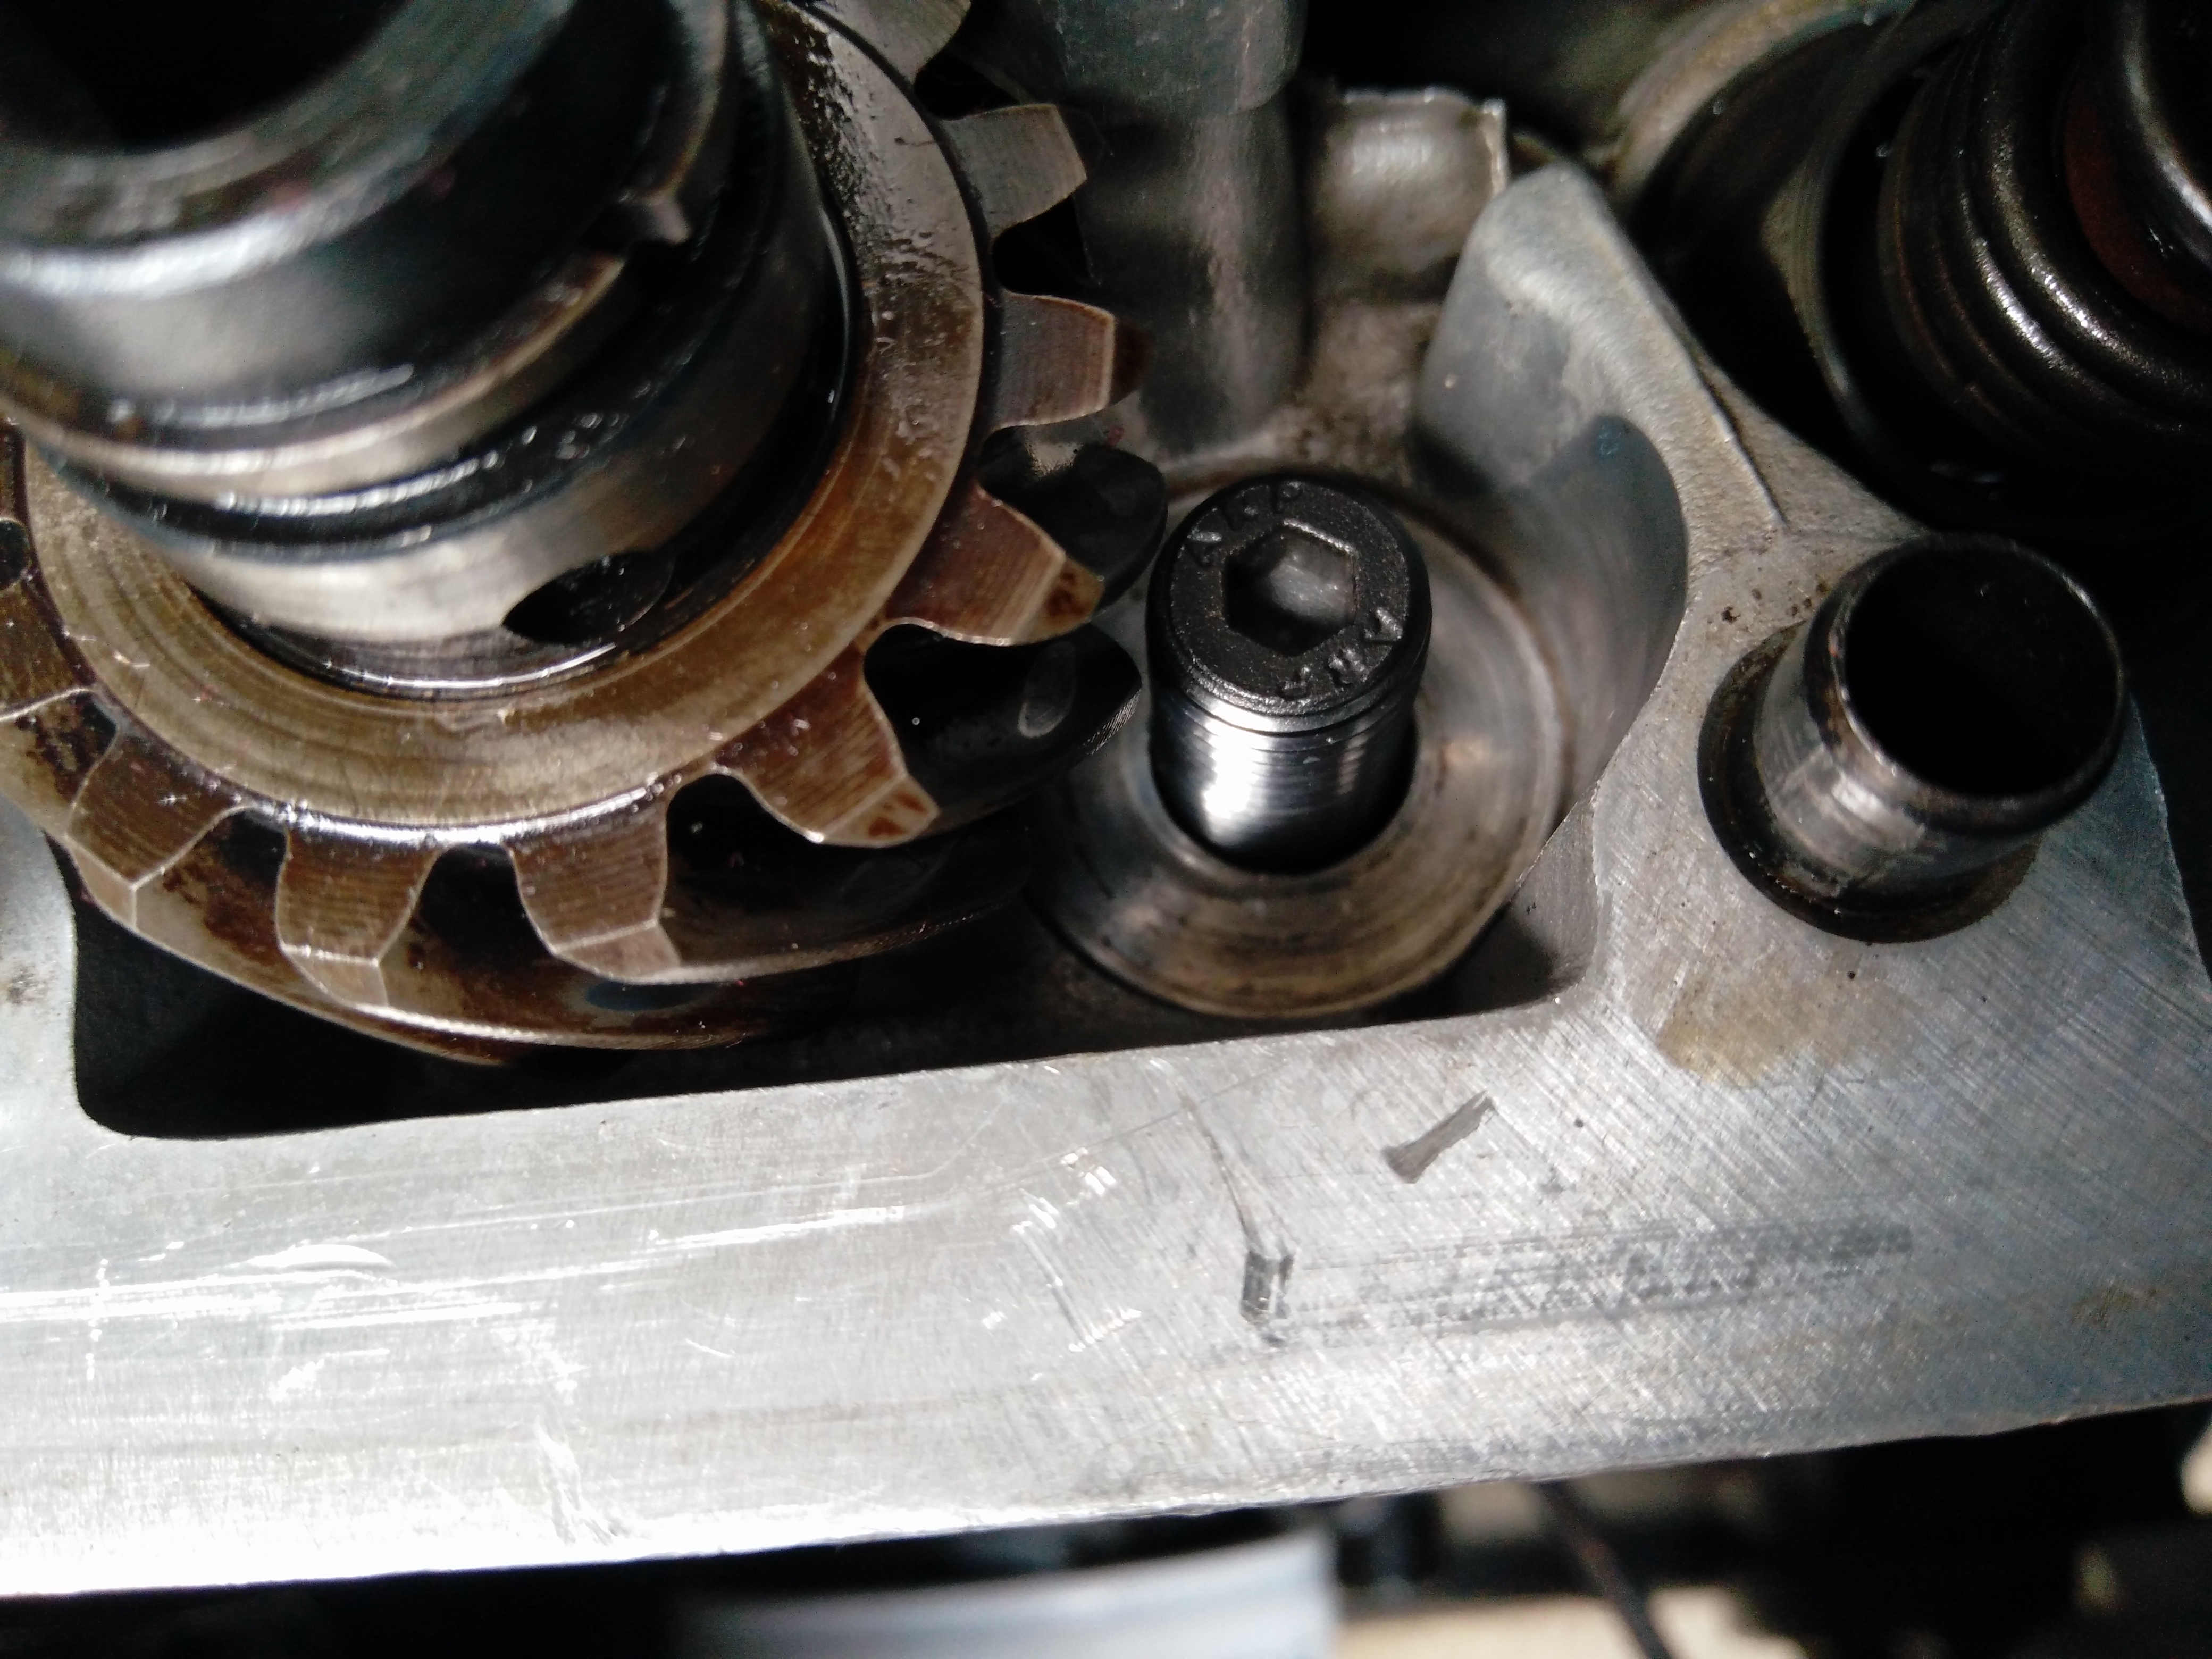
However, after several rounds of test fitting, measuring, filing the end of the stud and refitting it, I was happy enough that the stud would clear the corners of the gear teeth. Overall, I think I ended up taking about 2 or 3 mm extra off of the end of the stud, mostly for peace of mind. While this meant removing almost half of the threads at the bottom of the stud, there were still about a dozen full threads which should be more than enough.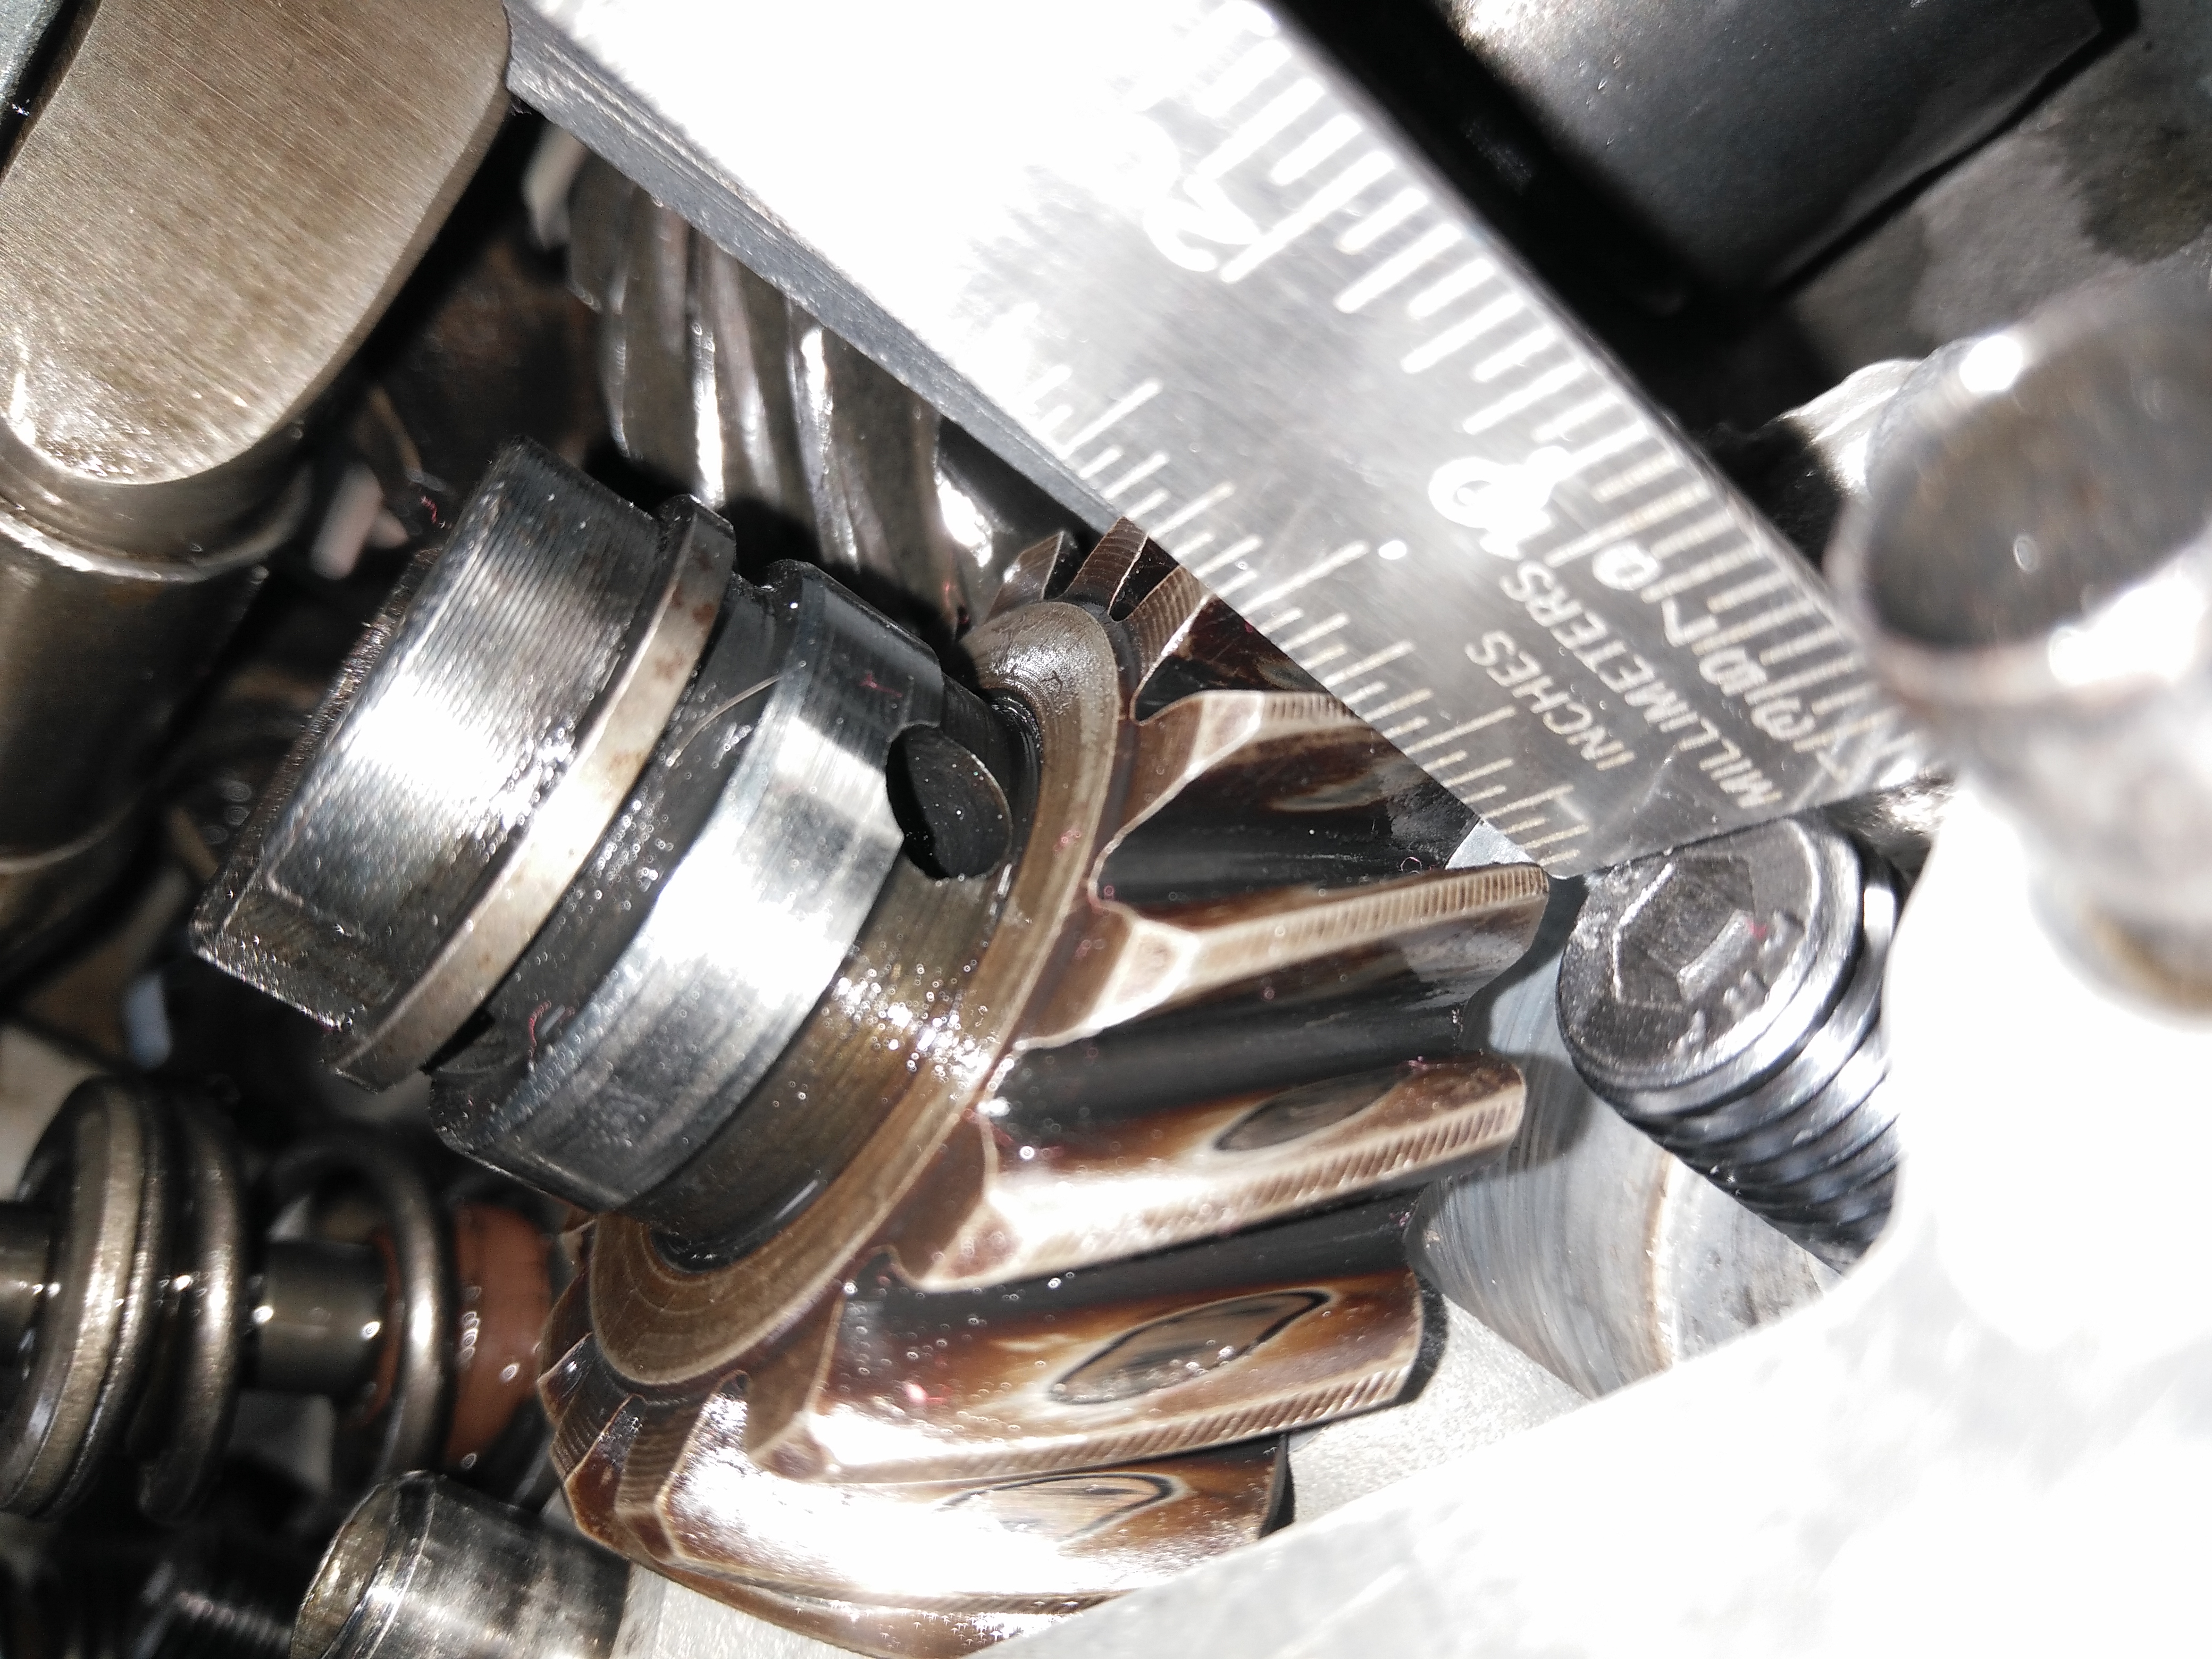
Overall, the process of test fitting and preparing the studs took maybe 12 or 16 hours over a couple of weeks. While this was going on, we were also cleaning up the head, manifolds and other pieces in preparation for reassembly.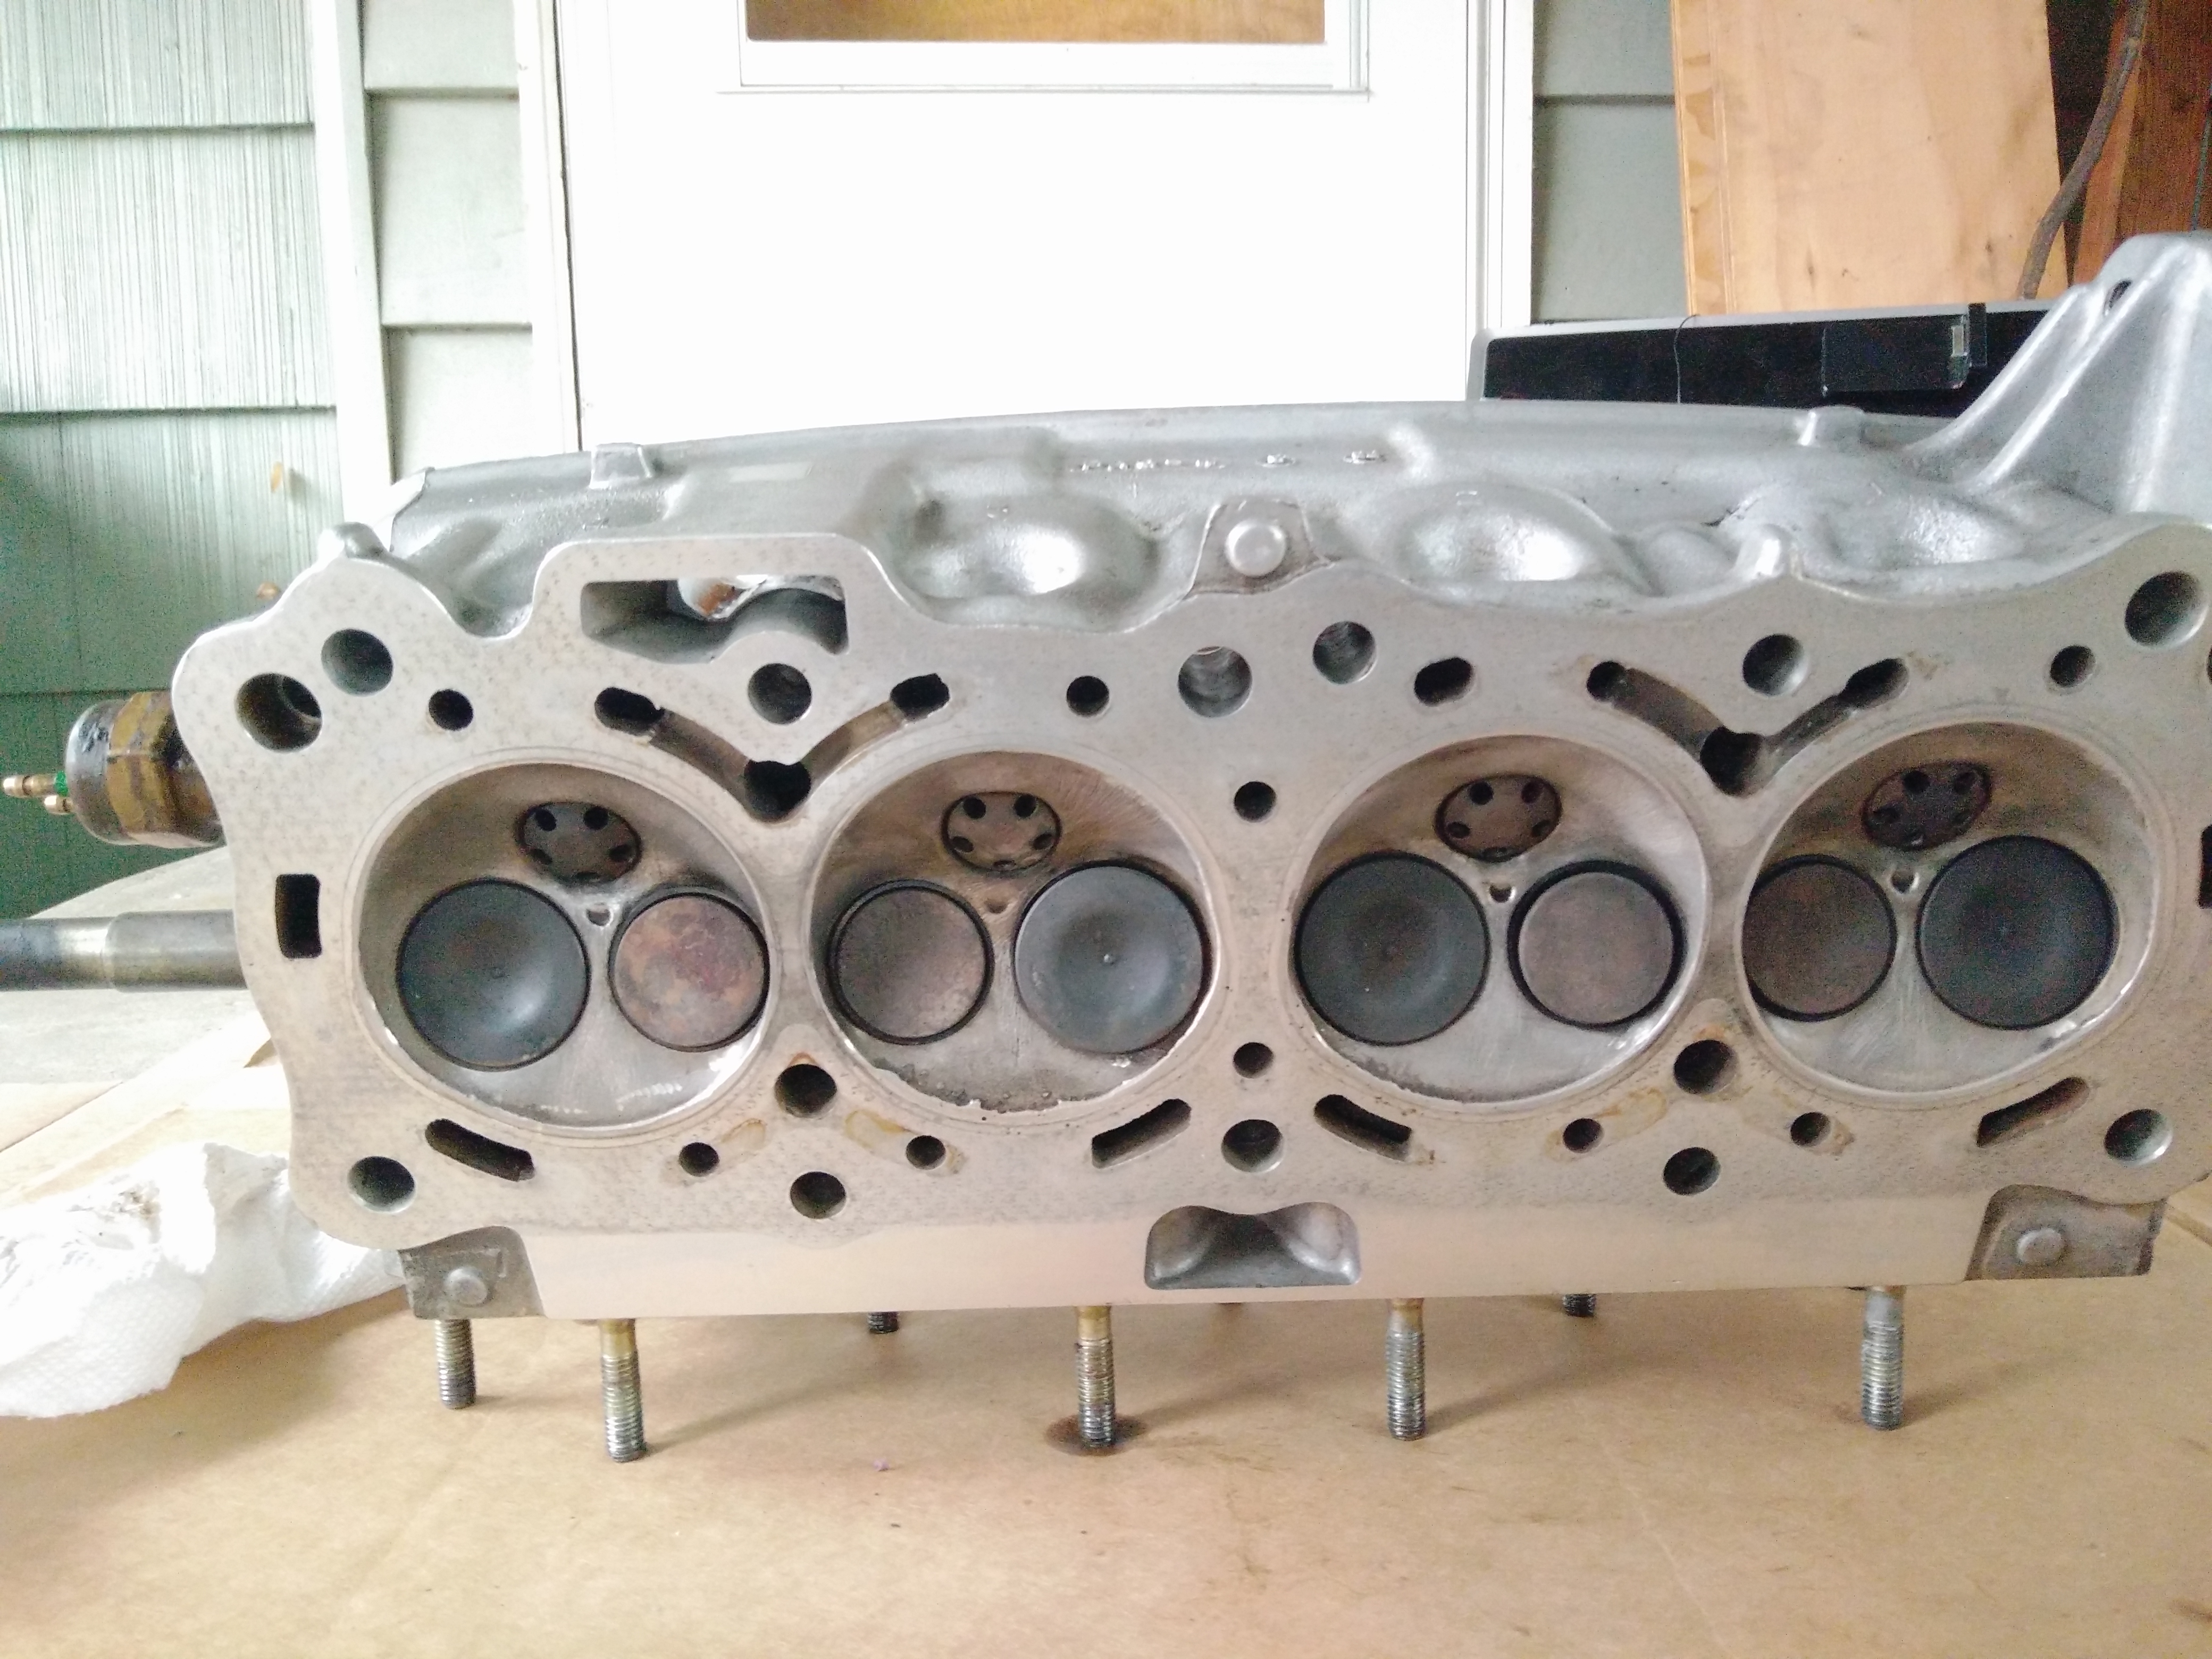
This took an incredible amount of detailed work, but the results were really impressive. For an old, dirty, hard-worked engine everything cleaned up really nicely, and before we knew it we were ready to start putting everything back together, starting with mating the head and manifolds.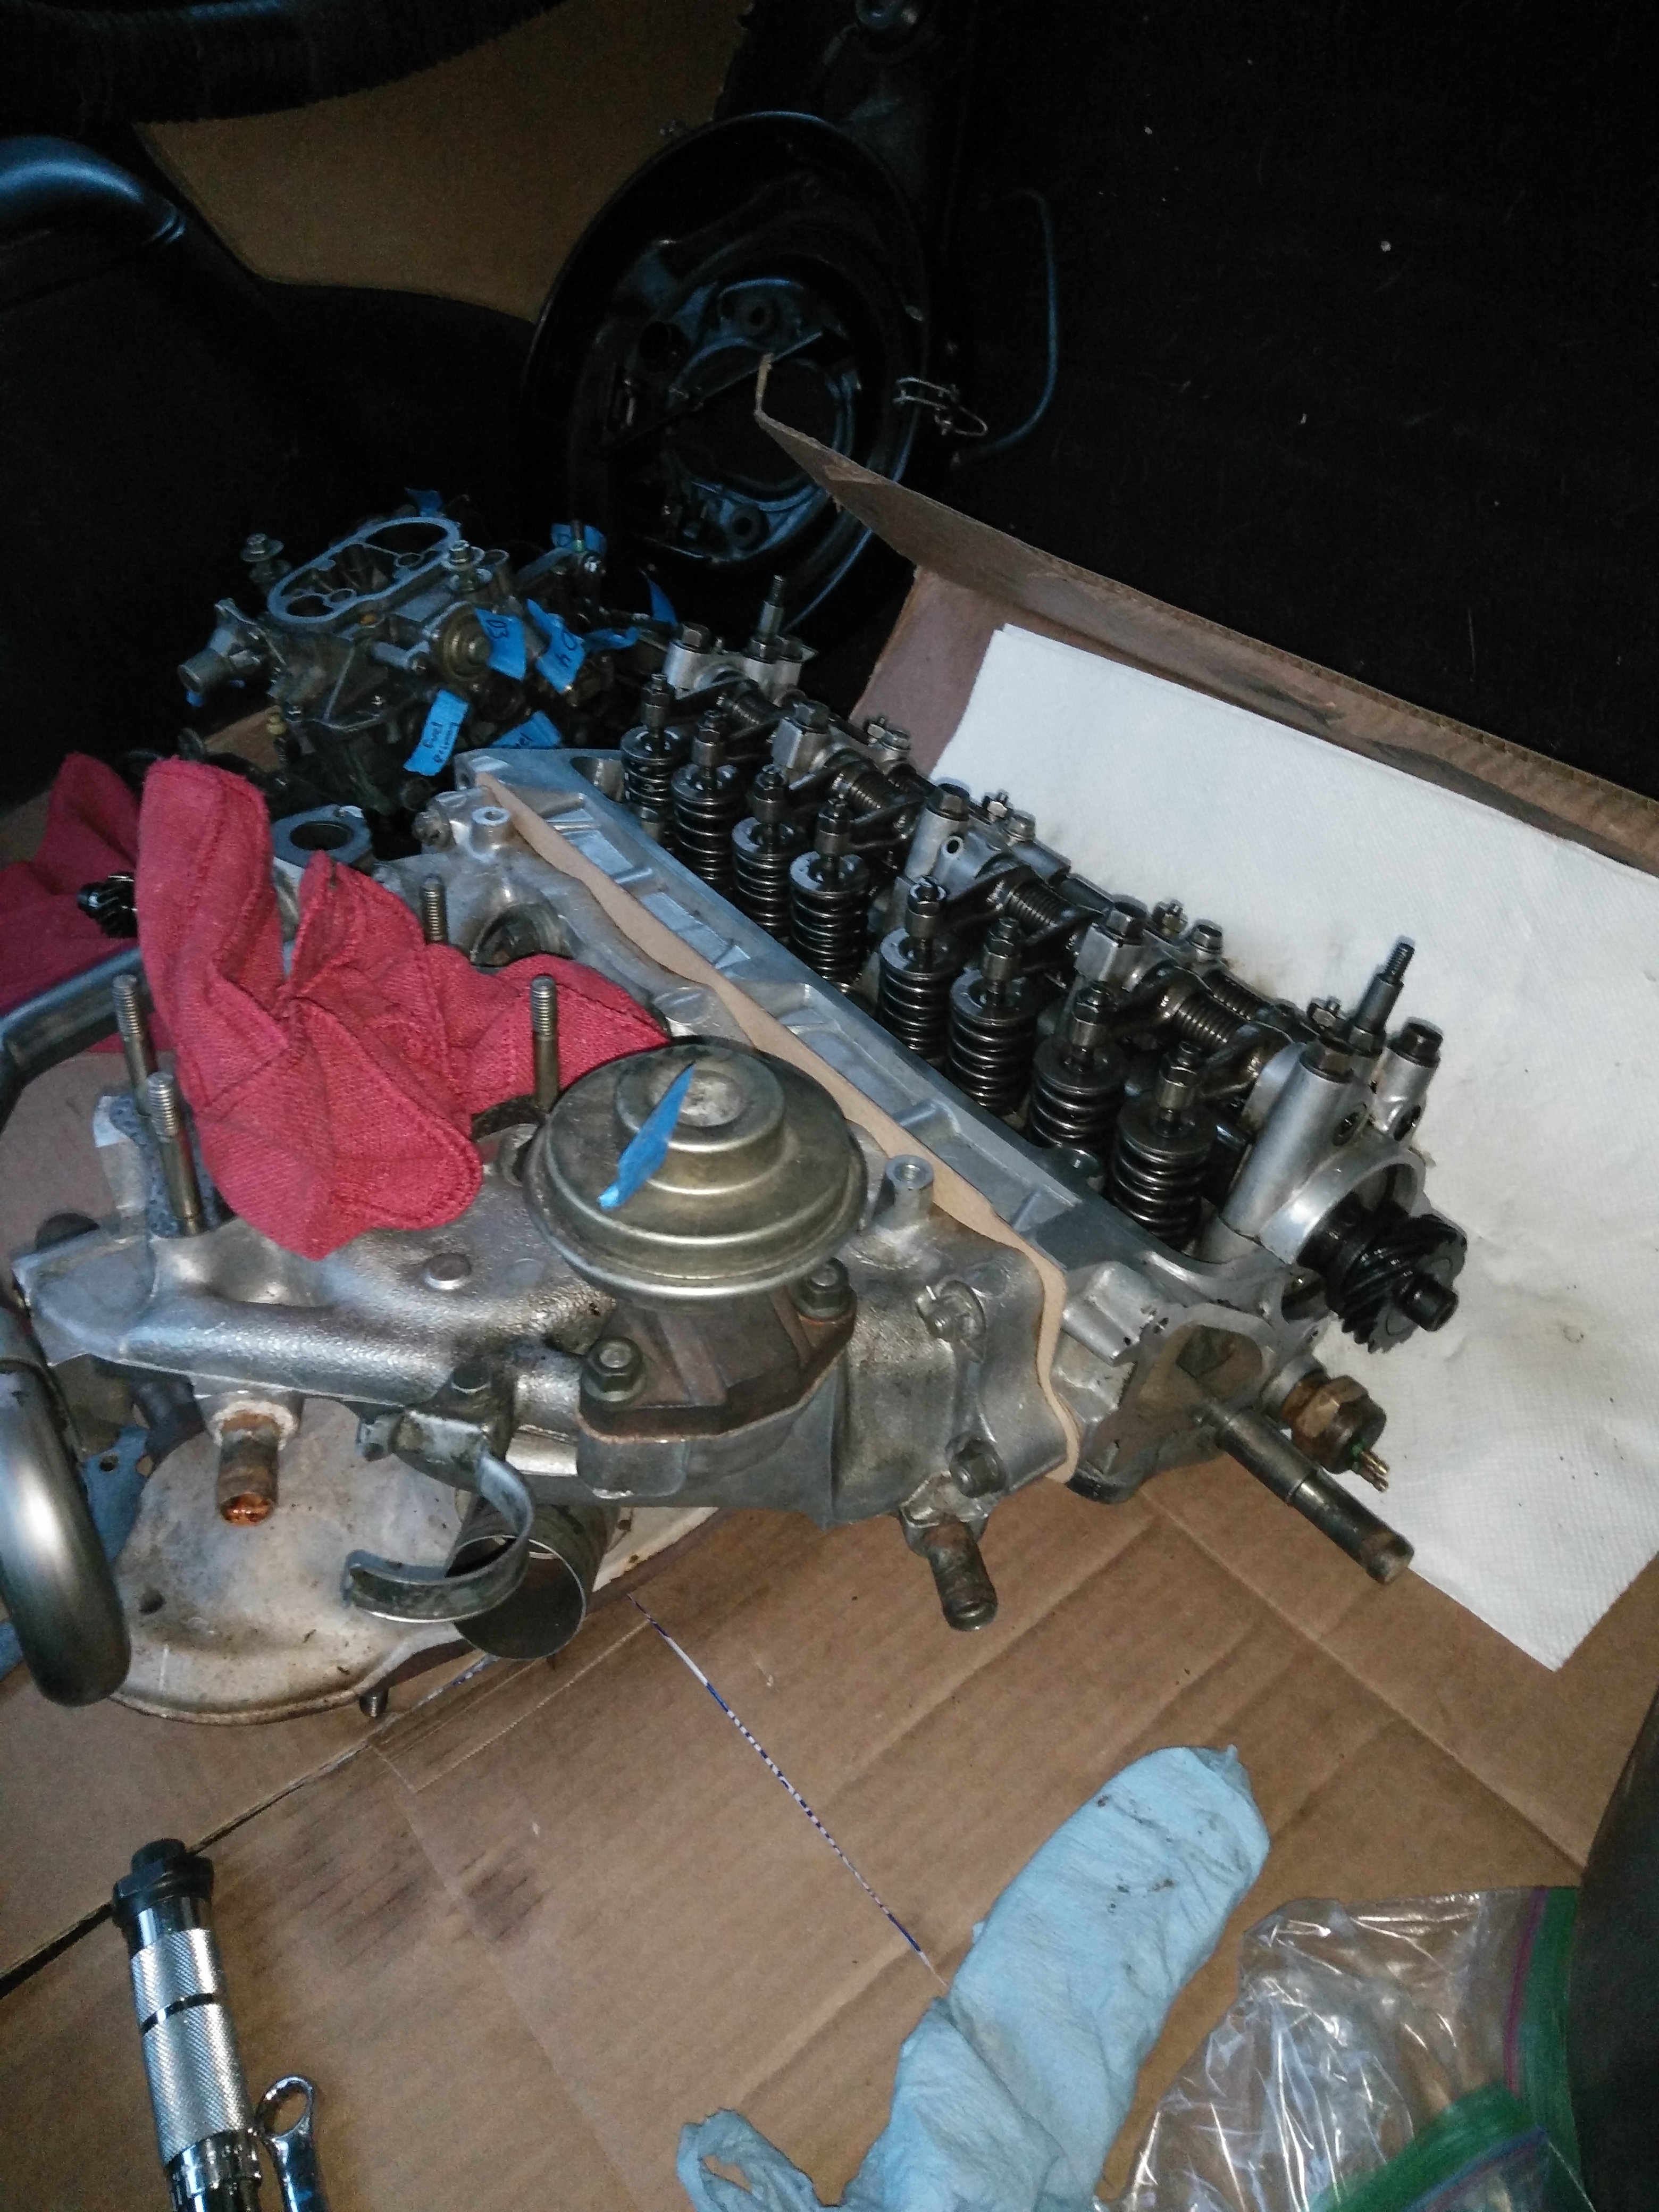
In my next post about this car I’ll cover the final assembly and next steps on this project.
This is the third post in a series about this car.
Part 1
Part 2
All posts in category ‘Honda’
Pingback: Dabbler : Installing the Head on my 1983 Honda Civic